If you want to find an alternative Movies or TV shows addon, then reptilia Kodi addon is the perfect Kodi addon for you. In this tutorial, we are going to discuss how you can Install Reptilia Kodi Addon on Amazon Firestick…
If you are familiar with the Exodus or Covenant Kodi addon, then you’ll be pleased to know that the Reptilia Kodi addon is a fork of the same. The addon has been developed by Androidbboy and is hosted under the Venom repo.Reptilia contains lots and lots of content that you can enjoy all day long without looking for another movie/ TV show Kodi addon. Its content is organized into categories such as Movies, TV Shows, New Movies, New Episodes, Channels, Tools and Search.
What’s more, the addon supports Real Debrid and Trakt, services that greatly enhance the Kodi experience. In this guide, we’ll take you through how to install the Reptilia Kodi addon on Amazon Firestick. The procedure for installation on Amazon FireStick or Fire TV is the same as on any other device running the same Kodi Krypton 17.6. If you are using an older version of Kodi for no reason, it’s advisable to upgrade to the latest stable version.
Important Note!
Reptilia is a third-party add-on and therefore not supported by the official Kodi repository. Third-party add-ons have attracted a lot of attention from government and copyright agencies in the recent past. Streaming illegal content can have you receive copyright infringement notices or face legal charges. It is therefore advisable to use a trusted VPN like Surfshark that can maintain your security and privacy. Surfshark is referred to as the best VPN for Kodi, and it’s actually the best VPN at the moment.
Readers exclusive offer: Click to Save 82% of Surfshark
Installing the Reptilia Kodi Addon
Before you install Reptilia addon, you need to enable “unknown sources” if you haven’t done so already. You can do this by going to Settings> Systems Settings> Add-ons> Unknown sources.
Adding the Repo source
- On the Kodi home screen, click the Settings icon. It looks like a cog and is on the top left side.
- On the System page that opens, select File Manager.
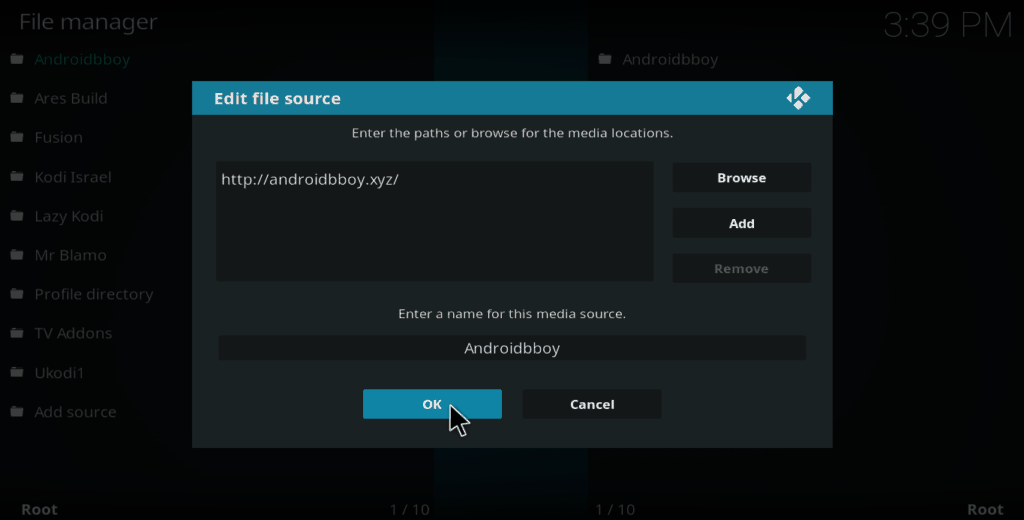
- Now, double-click Add Source. A new window will pop-up. Click <None> and type the source URL http://androidbboy.xyz. Confirm that you’ve typed it correctly, and then click
- In the name box below that, type the name Androidbboy. This name will be used later on. Click OK to close the box.
Installing Venom Repo
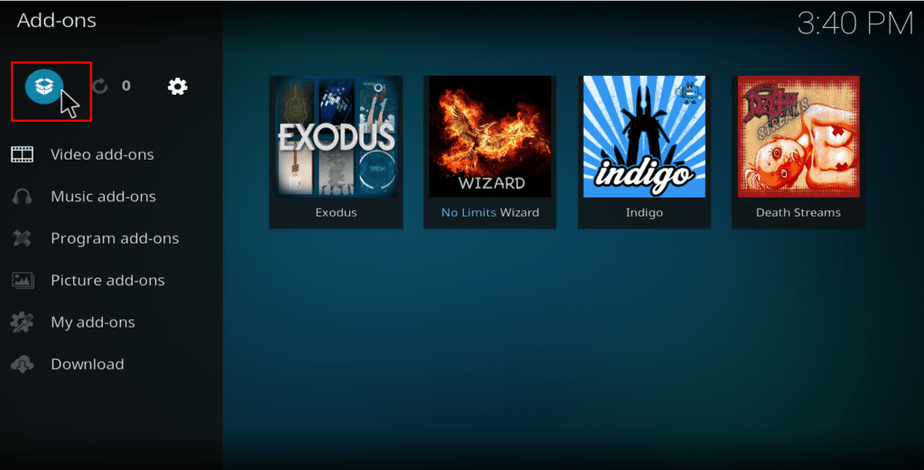
- Now, go back to the Kodi home screen and click on the Add-ons
- On the window that opens, click the open box icon on the top left side of the screen.
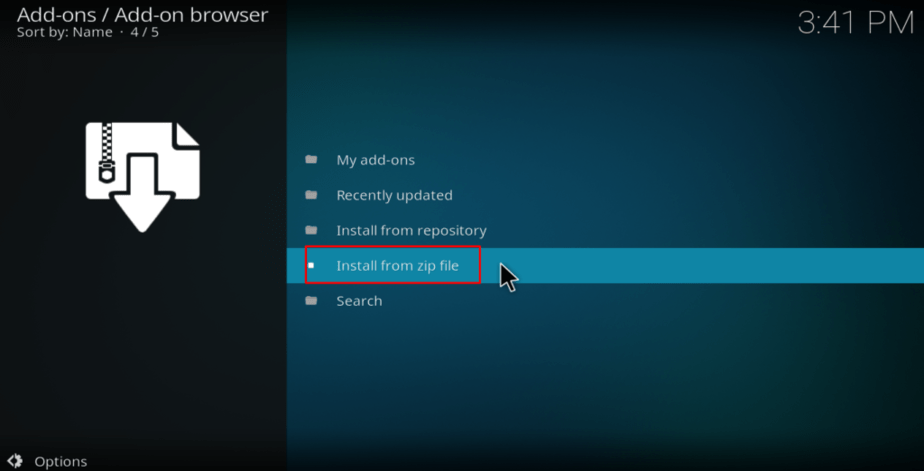
- Now, select Install from Zip file.
- Select Androidbboy. If you typed a different name, look for it.
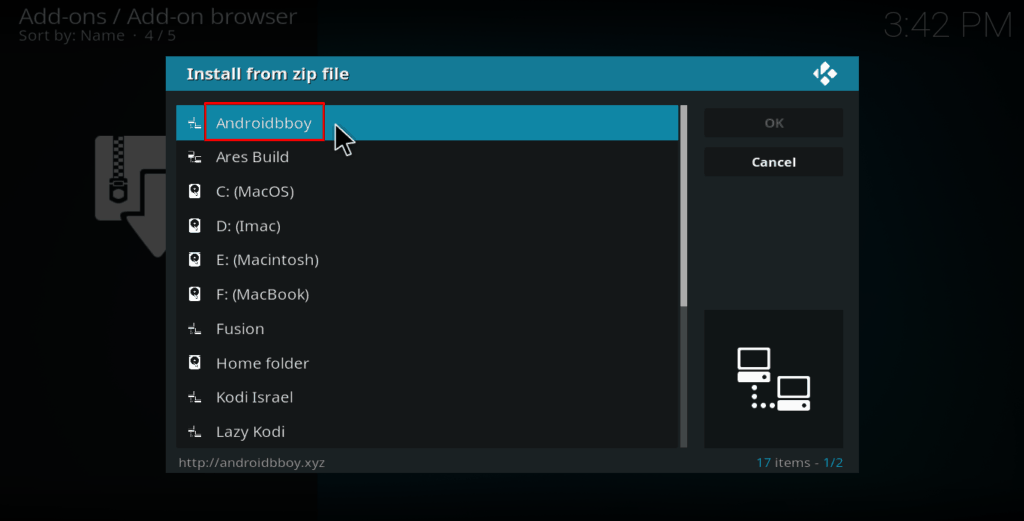
- Now, click on venon and then repository.venom-x.x.zip
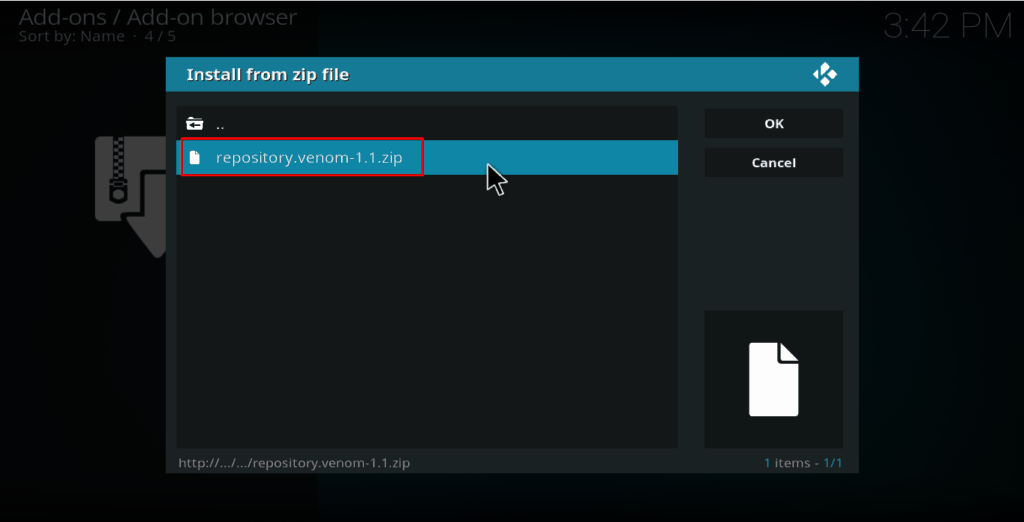
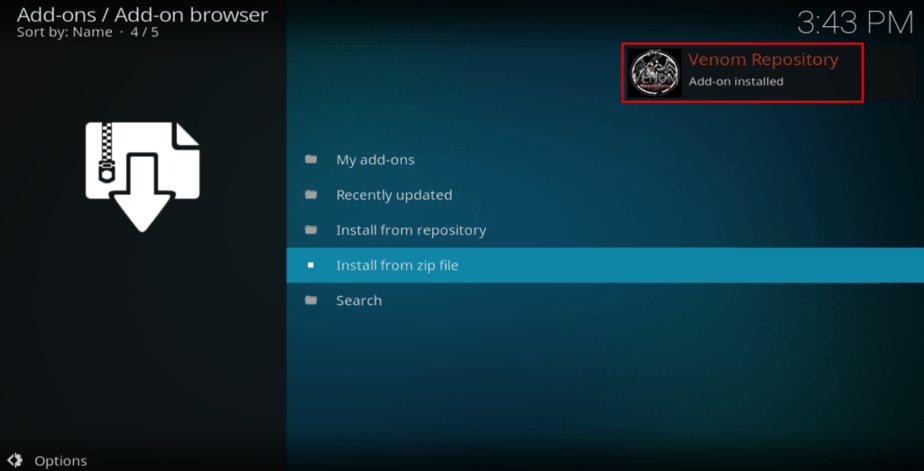
- The repo will now install, and you’ll get a notification when the installation is complete.
Installing Reptilia Addon
- On the same screen, select Install from repository
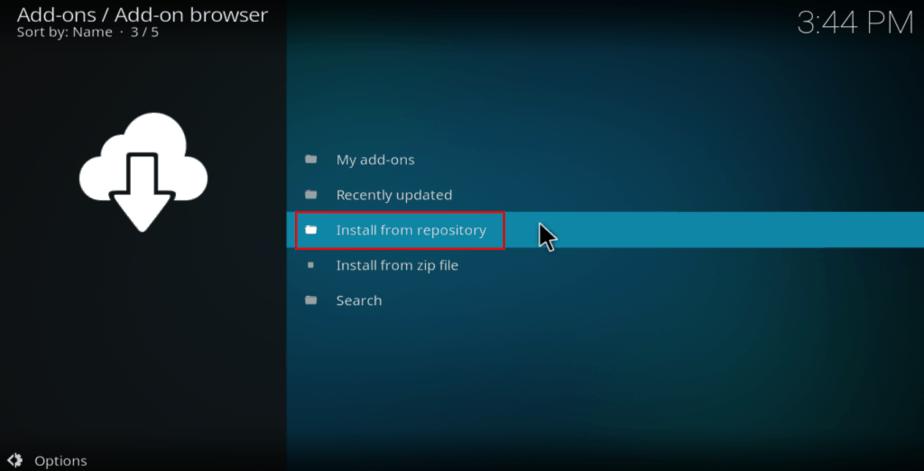
- Select Venom Repository
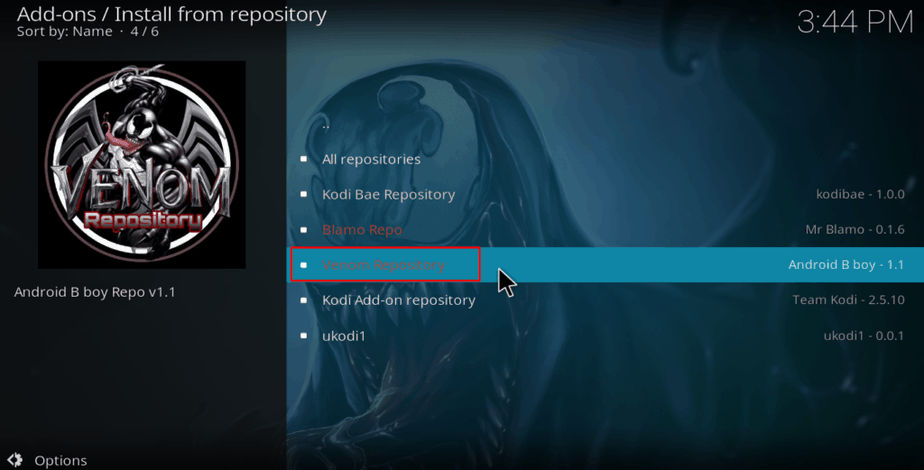
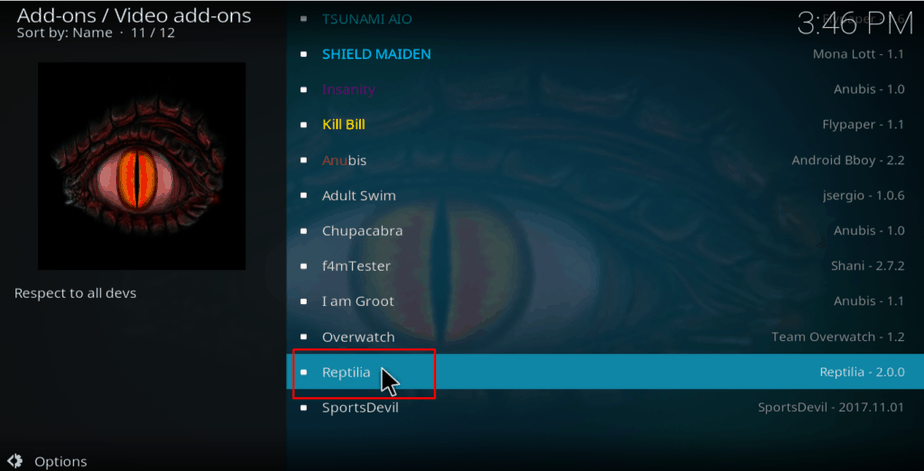
- In the sub menu, select Video addons. You will now get a list of the addons under Venom repo. Identify Reptilia and click on it.
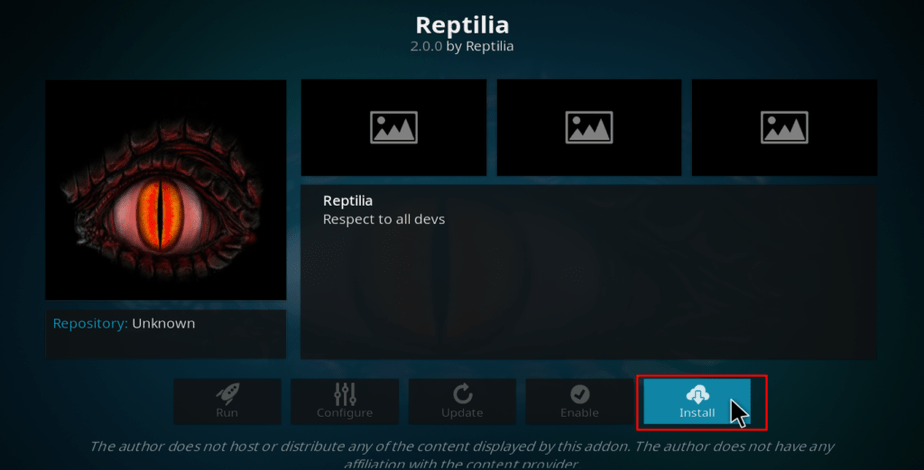
- You should now have an option to install. Hit it.
- After the installation is complete, you’ll get a notification.
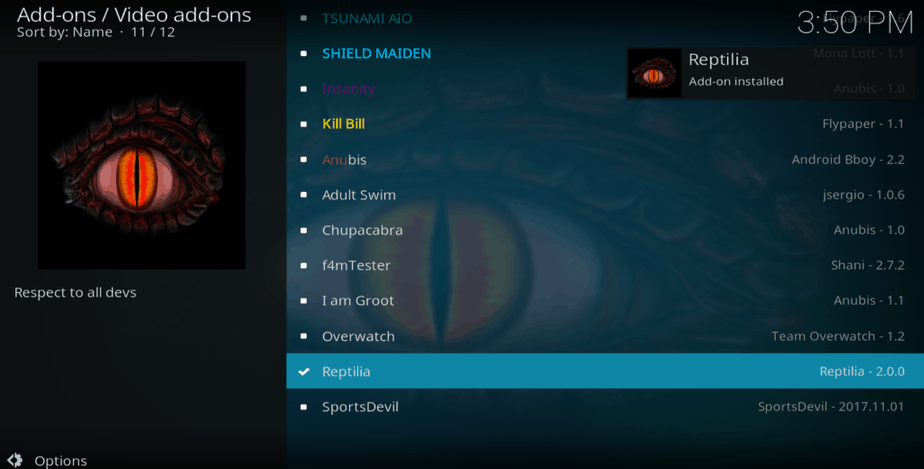
Feel free to install any other addon you like in the repository.
After that, go back to your Kodi home screen and click on the Add-ons tab. You should see Reptilia Kodi Addon. If not, give it a few more seconds.
You can now enjoy streaming your favorite Movies and TV Shows on Kodi. Remember to turn on your VPN first before you stream using any third-party Kodi Addon.
Readers exclusive offer: Click to Save 82% of Surfshark


Leave a Reply